
All fixtures and fittings including televisions, ornaments, units, carpets etc. must be removed before commencement of work.
Typical Schedule of Works for DPC Installation
- Remove skirting boards to work area.
Note: If the skirting boards are found to be rot affected during removal, they will need replacement and you will be notified of this. Dependent on the age and profile of the existing skirting boards, it may not be possible to obtain identical skirting boards. - Hack off plaster to damp affected areas to a height of 1.2m or 300mm beyond the last signs of damp.
- Inject a new damp proof course using Ultracure DPC cream.
- Render the walls with a backing coat of sand and cement with a waterproof additive.
- Apply a skim finish coat of plaster using Multifinish or equivalent.
- Re-fix the existing or new skirting boards.
The sand and cement backing coat has to be left to dry to a certain extent before we apply the skim finish. The backing coat will have a waterproof additive within the mix to act as a barrier to prevent any damp penetrating the new backing coat. We do not use a browning backing plaster as this type of plaster is no barrier to damp.
It should be noted that re-decoration of walls after damp proofing works must be minimal for at least 3-6 months, the plaster must be allowed to dry out thoroughly. If re-decoration such as emulsion painting or papering is carried out before drying out has occurred, moisture will be sealed into the wall and cause damage to new decoration. A customer information leaflet detailing drying out times and re-decoration is always given to the customer.


https://plsremedialservices.co.uk/services/damp-proof-course-installation.html#sigProId319c72377c
What is Rising Damp?
Rising damp can develop in walls due to the lack of an effective damp proof course and usually can occur in properties built with brickwork, stone and plaster which are all absorbent materials.
Rising damp is caused by moisture in the ground around and under the property rising up within external and internal walls, causing internal decoration to become damaged and lead to mould growth.
Treatment requires removal of damp affected plaster to approx. 1m or 300mm beyond the last signs of damp.
How to spot rising damp
Dampness, mould growth and staining will be visible along the lower part of the external or internal wall. Internally damp will be seen approximately one metre above the ground floor level damp proof course (blistering of plaster wall finishes or disruption to the wallpaper will be obvious signs). A CSRT member will be able to ascertain if the damp is true rising damp or from another source such as condensation or penetrating damp.
How can I get rid of it?
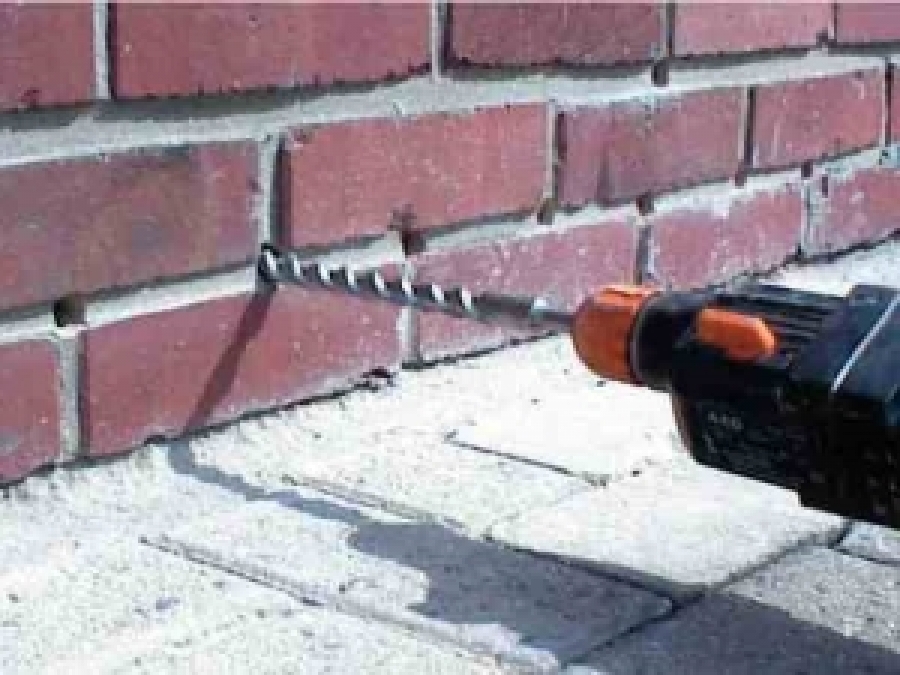
If a damp proof course has failed, the damp affected plaster can be removed and replaced in the section that has failed. If a property does not have a damp proof course, one can be introduced by a professional who can inject the walls, the chemicals injected will be absorbed and form an impervious barrier.
It is necessary with this process to ensure all internal plaster from the affected walls is removed before the damp proof course is introduced. By means of drilling and injecting the solution into the mortar beds at low level, the solution will level and dry into the mortar bed forming a barrier against future damp problems. Once the walls have been treated a new sand and cement render with a waterproofer will be applied internally. The walls will be finished with skim plaster.
Why does the plaster have to be removed?
The new damp proof course will prevent moisture rising and the masonry will begin to gradually dry out, however due to the effects of ground salts, the plaster to the damp affected walls will have become hygroscopic and will continue to be damp and that is why the existing plaster is removed.
I have damp staining on a wall but it is higher than one metre, what might this be?
There may be problems with lead flashings to chimney stacks causing water ingress to track down a wall and cause damp patches at high level.
The burning of fossil fuels in fireplaces causes salt deposits over many years to penetrate brickwork on chimney breasts and show as damp patches on walls.
If the wall has been lined with plasterboard by the ‘dot and dab’ method, sometimes damp will track across the dab positions and show as damp patches on the wall.
We can take plaster samples from the damp affected walls to allow laboratory analysis to determine the exact cause of the damp.
Damp floors may cause damp in walls
In older properties with solid concrete floors, often the floors were laid with no membrane barrier to prevent damp rising from the ground through the concrete slab. If this is the case, over the years, the floor can become damp and allow moisture to travel from the floor and up the walls causing damp.
A wall floor junction groove filled with DPC screed can be inserted around the perimeter of the floor to provide a barrier and solve the problem, however if the floor is too badly damp affected, the floor may need to be dug out and a replacement new floor laid.
We can provide tests to ascertain the floors are damp with deep probe testing.